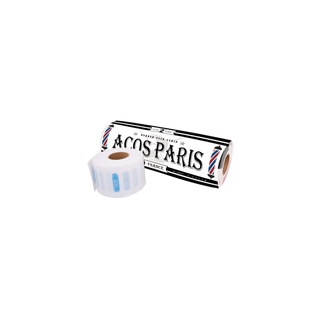
Neck strips serve several practical functions:
-
Hygiene: They act as a barrier between the client's skin and the barber's tools, preventing direct contact with loose hair and potential skin irritants.
-
Cleanliness: By catching loose hair and preventing it from falling onto the client's skin or clothing, neck strips help maintain a clean and tidy grooming environment.
-
Comfort: The soft material of the neck strip ensures that the client remains comfortable throughout the haircut or grooming session, minimizing any irritation or discomfort caused by loose hair or grooming products.
-
Professionalism: The use of neck strips demonstrates professionalism and attention to hygiene standards in a barber shop, enhancing the overall client experience and satisfaction.
Overall, neck strips are essential accessories in barbering, providing both practical benefits and contributing to the professional image of the barber shop.
1. Prepare the client: Before applying the neck strip, ensure that the client is comfortably seated and wearing a barber cape to protect their clothing.
2. Select the neck strip: Choose an appropriate neck strip from the roll or pre-cut sheets. Ensure that the strip is long enough to wrap comfortably around the client's neck and cover the back of the neck and collar area.
3. Position the neck strip: Place the neck strip around the client's neck, ensuring that it covers the back of the neck and extends slightly over the collar line. The strip should be positioned snugly but not too tight to ensure comfort for the client.
4. Secure the neck strip: If the neck strip has adhesive tabs, peel off the backing and press the tabs firmly against the strip to secure it in place around the client's neck. Alternatively, if the neck strip does not have adhesive tabs, tuck the ends of the strip into the collar of the barber cape to hold it in place.
5. Adjust if necessary: Check to ensure that the neck strip is securely in place and that it covers the entire back of the neck and collar area. Make any necessary adjustments to ensure a comfortable fit for the client.
6. Proceed with the grooming session: Once the neck strip is properly applied and secured, proceed with the haircut, shaving, or grooming session as usual. The neck strip will help protect the client's skin and clothing from loose hair, moisture, and grooming products.
7. Dispose of the neck strip: After the grooming session is complete, carefully remove the neck strip from the client's neck and dispose of it properly. Neck strips are designed for single-use and should be discarded after each client to maintain hygiene standards in the barber shop.
Returns:
Need to return an item? Just send us the product you have purchased and we will refund the price as soon as possible. We do not refund any products which has been opened or used.


